


As one starts building his application in ReactJS, one needs to keep an eye on the complexity of application state management. As the application state tree grows with more nodes, the complexity to manage them also increases widely. So, we need a state management utility to manage our states effectively. Here will be using Redux, a library coupled with our ReactJS application for state management.

Pre-Requisite:
The package manager (npm, yarn) is installed in your system. (Download it from here, if not installed https://nodejs.org/en/download/ and follow the steps as guided).
Have some prior basic knowledge of Javascript and HTML.
So, we’ll first start with creating a new React project from scratch, and then we’ll integrate Redux into the application.
Create a new React App :
 React
React
We will be using create-react-app (CRA), it just creates a frontend build pipeline, with all the necessary initial files ready for use.
*npx create-react-app <app-name>`e.g: npx create-react-app first-app`*This will create a readymade development environment with all the required dependencies installed and initial codebase to start with, as illustrated below.
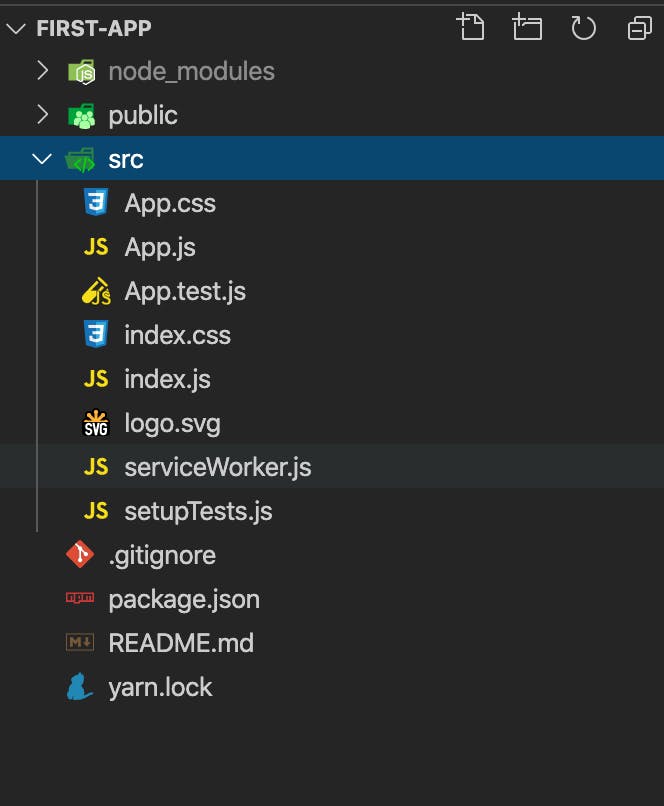
We’ll be working under the src/ folder of my project directory.
Directories description -
a. public/ — It’s the root folder that gets dealt by the web server in the end. It contains all the files, which are present as it is when the application is built for production. It also contains the index.html file, which is the root HTML file of the application. b. src/ — It’s the root folder for development purposes. All the dev files are present inside this folder. c. node_modules/ — It contains all the dependencies installed for the application.
src/index.js acts as the script file for the public/index.html file.
For development purposes, we will be using a root js file, preferably App.js.
So, for demo purposes, we will be using an online dummy server like https://jsonplaceholder.typicode.com/posts, and we will be fetching and displaying the data on the screen just as shown below.
 Simple “All-Posts” to show React-Application.
Creating a new React application without Redux setup:
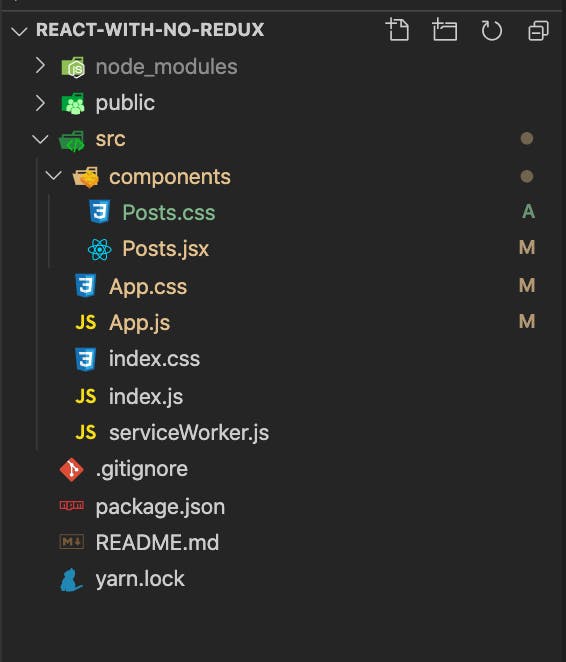
- We will be having a code directory structure like this. We have removed non-essential files and created a new component — Posts.jsx for showing the fetched posts.
We will be rendering all the post on the screen, so we separated that logic in a separate component, and called the component on our parent component, App.js.
First, we will be creating a class component and calling it from the parent component. So, create a new file under the components/ folder with the name as Posts.jsx. This file will be having all the component logic to show All Posts on the screen.
So Posts.jsx will be containing the below logic, so render the All Posts section.
import React, { Component } from 'react';
import './Posts.css';

class Posts extends Component {

    constructor(props) {
        super(props);
        this.state = {
            posts: []
        }
    }

    renderEachPosts = () => {
        const { posts } = this.state;
        if (posts.length > 0) {
            return posts.map(post => {
                return (
                    <div className="post-div">
                        <ul>
                            <li>ID: {post.id}</li>
                            <li>Title: {post.title}</li>
                            <li>Body: {post.body}</li>
                        </ul>
                    </div>
                )
            })
        }
        else {
            return <p>No data to display </p>
        }
    }

    getAllPosts = (e) => {
        e.preventDefault();
        fetch('https://jsonplaceholder.typicode.com/posts')
            .then(resp => resp.json())
            .then(posts => this.setState({
                posts
            }));
    }

    render() {
        return (
            <div className="post-container">
                <div>
                    <header>
                        <h1>All Posts</h1>
                    </header>
                    <main>
                        <div className="posts-section">
                            {this.renderEachPosts()}
                        </div>
                    </main>
                    <footer>
                        <button type="button" onClick={this.getAllPosts} >Get all Posts</button>
                    </footer>
                </div>

            </div>
        );
    }
}

export default Posts;
Here, we have created a div which will be showing all the posts on the click of a “Get all Posts“ button . On the click of the button, it will start fetching response data from the given url. As in fetch api, GET is the default method, it will fetch the response, convert it to JSON format and then set in the posts state.
- We can have inline styles in this, but it’s better to prefer the external style files for reusability and all. So the external style file, App.css has the below logic.
.post-container {
    position: absolute;
    left: 25%;
    border: 2px solid black;
    width: 500px;
    height: calc(100vh - 204px);
    margin: 100px;
    background-color: #f98167;
}

h1 {
    text-align: center;
    text-decoration: underline;
}

footer {
    position: absolute;
    bottom: 20px;
    left: 50%;
    margin: 0;
    -ms-transform: translate(-50%, -50%);
    transform: translate(-50%, -50%);
}

.posts-section {
    border: 1px solid black;
    margin: 5px;
    height: calc(100vh - 350px);
    background-color: #dfe5cc;
    overflow-y: scroll;
}

.post-div {
    border: 1px solid black;
    margin: 2px;
    overflow: scroll;
}
- Now, as we have our Posts components ready, it’s time to call it for our use. So, inside the App.js file, we will be calling the Posts component, like this.
import React from 'react';
import './App.css';
import Posts from './components/Posts';

function App() {
 return (
     <div className="App">
       <Posts />
     </div>
  );
}
export default App;
And App.css with the following style logic,
body,
html {
  height: 100%;
  margin: 0;
  padding: 0;
  background-color: black;
}
By this, we will be able to create a simple basic React application without any state management library required. But in this example, it was just one state to manage, but as we move forward with more components, we need one states store-house to retrieve and manage all the states synchronously from any components. There, we will required to setup a state management to manage complex states together.
Creating a new React application with Redux setup: (Without Redux Toolkit)
 React-Redux
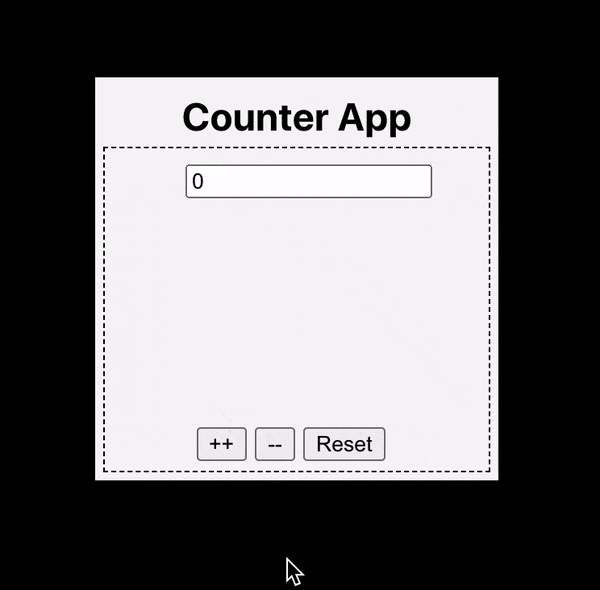
So, for this tutorial, we will be building a simple counter application using React and Redux for state management.
Before, we start we have to install redux dependencies for our application.
**npm install redux**   (for redux-core package)
**npm install react-redux** (for integrating with react)
**npm install --save-dev** redux-devtools (for developers use)
- Now if we have installed necessary dependencies, we can look over the redux directory structure.
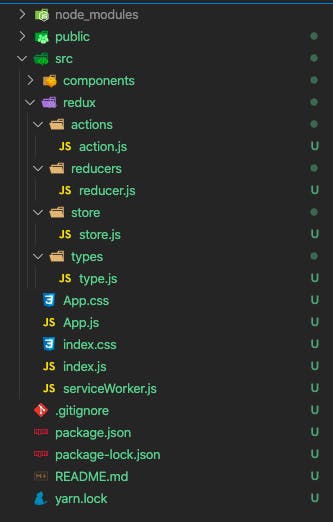 React-Redux directory structure
- We have created different folders inside our redux directory, before moving further let’s discuss these folders.
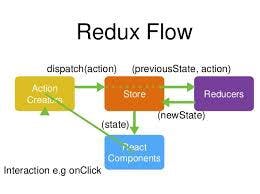 Redux Flow
**Store:** The store acts as the single source of truth for a react-redux application. It is the object that brings them together. It has the following responsibilities: i. Holds the application state. ii. Allows access to state. iii. Allows state to be updated.
A redux application should contain only a single-store. All other splittings of data logics can be done by reducer-composition instead of many stores.
import { createStore, applyMiddleware, compose } from "redux";
import logger from 'redux-logger'
import reducer from "../reducers/reducer";
import thunk from "redux-thunk";
import { composeWithDevTools } from 'redux-devtools-extension';

const composeEnhancer = composeWithDevTools || compose
const middleWare = [thunk, logger];

export const store = createStore(
    reducer, composeEnhancer(applyMiddleware(...middleWare)));
It is easy to create a store if you have a reducer. We can use combineReducers() to combine several reducers into one.
createStore, creates a Redux store that holds the complete state tree of your app.
applyMiddleware is the suggested way to extend Redux with custom functionality. The most common use case for middleware is to support asynchronous actions without much boilerplate code or a dependency. It does so by letting you dispatch async actions in addition to normal actions. eg: redux-thunk.
compose helps in improved readability and convenience. Compose is used when you want to pass multiple store enhancers to the store. Store enhancers are higher-order functions that add some extra functionality to the store. The only store enhancer which is supplied with Redux by default is applyMiddleware.
logger helps in logging redux-actions to the console.
We have also used redux dev tools for using its functionality for dev. purposes.
**Actions*: Actions are payloads of information that send data from your application to your store. They are the only* source of information for the store.
They are plain Javascript objects, that must have a “type” property that indicates the type of action being performed, and a “payload/data” property for the store.
So, we will be defining our action type for our application.
export const INCREMENT_COUNTER="INCREMENT_COUNTER";
export const DECREMENT_COUNTER="DECREMENT_COUNTER";
export const RESET_COUNTER="RESET_COUNTER";
Here, we have defined what types of actions, we will perform on our Redux application.
Next, we will define the Action Creators, these are pure functions to create actions.
import { INCREMENT_COUNTER, DECREMENT_COUNTER, RESET_COUNTER } from '../types/type';

export const increaseCounter = (count) => {
    return async (dispatch) => {
        dispatch({ type: INCREMENT_COUNTER, payload: count })
    }
}

export const decreaseCounter = (count) => {
    return async (dispatch) => {
        dispatch({ type: DECREMENT_COUNTER, payload: count })
    }
}

export const resetCounter = (count) => {
    return async (dispatch) => {
        dispatch({ type: RESET_COUNTER, payload: count })
    }
}
Here, we have used bindActionCreators, they turn an object whose values are action creators, into an object with the same keys, but with every action creator wrapped into a [dispatch](redux.js.org/api/store#dispatchaction) call so they may be invoked directly.
Normally you should just call dispatch directly on your store instance. If you use Redux with React, react-redux will provide you with the dispatch function so you can call it directly, too.
The only use case for bindActionCreators is when you want to pass some action creators down to a component that isn't aware of Redux, and you don't want to pass [dispatch](redux.js.org/api/store#dispatchaction) or the Redux store to it.
So, in short, we have bound our action creators with dispatch to call them directly, without complete Redux store to it.
Reducers: Reducers specify how the application’s state changes in response to actions sent to the store. The reducer is a pure function that takes the previous state and an action, and returns the next state.
(previousState, action) => nextState
Just remember that the reducer must be pure. Given the same arguments, it should calculate the next state and return it. No surprises. No side effects. No API calls. No mutations. Just a calculation.
So, now we will define the reducer state for our application-
import { INCREMENT_COUNTER, DECREMENT_COUNTER, RESET_COUNTER } from '../types/type';
const initialState = {
    count: 0
};

const counterReducer = (state = initialState, action) => {
    switch (action.type) {
        case INCREMENT_COUNTER: return { ...state, count: action.payload };
        case DECREMENT_COUNTER: return { ...state, count: action.payload };
        case RESET_COUNTER: return { ...state, count: action.payload };
        default: return state;
    }
}

export default counterReducer;
import { combineReducers } from 'redux';
import counterReducer from './counterReducer';

export default combineReducers({
    counterReducer
});
Here, as we can see, we have defined pure reducing functions, it takes the previous state using the spread operator, and mutates the required state with the action and gives us the next action.
Also, as your app grows more complex, you’ll want to split your reducing function into separate functions, each managing independent parts of the state.
The combineReducers helper function turns an object whose values are different reducing functions into a single reducing function you can pass to [createStore](redux.js.org/api/createstore).
So, this is how we structure Redux into other React application for state management.
Next, we will see how we connect the Redux store state and use it in our application.
import React, { Component } from 'react';
import './Counter.css';
import { connect } from 'react-redux';
import { increaseCounter, decreaseCounter, resetCounter } from '../redux/actions/action';

class Counter extends Component {
    render() {
        return (
            <div className="counter-container">
                <h2>Counter App</h2>
                <div className="counter-div">
                    <input type="text" value={this.props.count} className="counter-input" readOnly />
                    <div className="counter-btn">
                        <button type="button" onClick={() => this.props.increaseCounter(this.props.count + 1)} >++</button>
                        <button type="button" onClick={() => this.props.decreaseCounter(this.props.count - 1)} >--</button>
                        <button type="button" onClick={() => this.props.resetCounter(0)}>Reset</button>
                    </div>
                </div>
            </div>
        );
    }
}

const mapStateToProps = state => {
    return {
        count: state.counterReducer.count
    }
}

export default connect(mapStateToProps, { increaseCounter, decreaseCounter, resetCounter })(Counter);
To use Redux states into our application, we first need to connect the Redux store with the React application. For this, we will use the connect() function.
The
*connect()* function connects a React component to a Redux store. It provides its connected component with the pieces of the data it needs from the store, and the functions it can use to dispatch actions to the store. It does not modify the component class passed to it; instead, it returns a new, connected component class that wraps the component you passed in.
The mapStateToProps and mapDispatchToProps deals with your Redux store’s state and dispatch, respectively. state and dispatch will be supplied to your mapStateToProps or mapDispatchToProps functions as the first argument.
In simple words, mapStateToProps is the Redux state object, that we want to subscribe to and use in our component. While mapDispatchToProps functions are expected to return an object. Each field of the object should be a function, calling which is expected to dispatch an action to the store.
As in our application,
const mapStateToProps = state => {
return { count: state.counterReducer.count }
}
mapStateToProps contains the count Redux state, that we will be using in our application.
const mapDispatchToProps = {
return {
    increaseCounter,
    decreaseCounter,
    resetCounter
}
mapDispatchToProps contains the same actionCreators we defined in our action.js code above. These will be available as props in our application to dispatch actions to store.
For detailed information, you can check out the documentation here, https://react-redux.js.org/api/connect.
Now we have connected our React application with Redux store, mapped store state, and actions to be dispatched as props to the application.
As in our application, we have 3 buttons, that dispatches actions to the store onClick.
- For incrementing the count, we dispatch the increaseCounter with args incrementing count props state by 1.
this.props.increaseCounter(this.props.count + 1);
- Similarly, for decrementing counter, we dispatch the decreaseCounter with args decrementing count props state by 1, and resetting the counter, dispatching resetCounter with args as 0.
this.props.decreaseCounter(this.props.count - 1);
this.props.resetCounter(0);
Hence, our application will react to the redux state changes with each button click. So let’s see it work in action then,
So, if we cut short the story, actions are the pure functions that tell the reducer to change the state of the application. The store is the storehouse of all this, that brings all this together.
Conclusion
For smaller application, Redux will not have that much effect, but as our application move to more and more states, it gets complex to manage and flow from one component to another and then it’s a pain to manage state and debug state values in the application state tree. So Redux takes this pain and helps in managing state and it flows.
You can check out this repo for this article here, you will get both React with Redux and React without Redux demo code. akrsh24/React-Redux-Medium You can’t perform that action at this time. You signed in with another tab or window. You signed out in another tab or…github.com
For more detailed information on the Redux and it’s API’s usage, check out the official documentation. Redux — A predictable state container for JavaScript apps. | Redux A Predictable State Container for JS Apps Redux helps you write applications that behave consistently, run in different…redux.js.org React Redux · Official React bindings for Redux Official React bindings for Reduxreact-redux.js.org
Do give your comments, suggestion, post your doubts here or reach out to me for any queries.